How to Change DNS Settings on Windows 11, Windows 11 DNS Change, How to change DNS in Windows 11? How to Change DNS Settings in Windows 11 Windows 11 DNS settings change pictorial explanation. How to set IPv4 DNS settings on Windows computers?
What is DNS? What does it do?
DNS or Domain Name System, Web sites have IP addresses. The domain name concept emerged because it would be difficult to memorize these IP addresses. This is where the task of DNS comes into play. It converts the name of the website, namely the domain name that we entered into the Internet browser, to the IP address of that site.
Why are we changing DNS?
DNS servers have a certain speed when converting domain names to IP addresses. These speeds affect our connection speed to the Internet. A good DNS address for this will also affect your Internet speed. This situation pushes us to change DNS. Today, the most used and fastest DNS addresses are Google’s 8.8.8.8 and 8.8.4.4 DNS addresses.
Current DNS Addresses, Fastest IPv4 IPv6 DNS Addresses
Windows 11 DNS Change
Microsoft has made many changes to the appearance of Windows 11, the latest popular operating system. The settings have changed according to Windows 10, so most users cannot find the locations they want and cannot do it. One of these topics is Windows 11 DNS Changing… How do we change Windows 11′ DNS? We have prepared pictures for you. Good luck with it.
How to Change DNS Settings on Windows 11
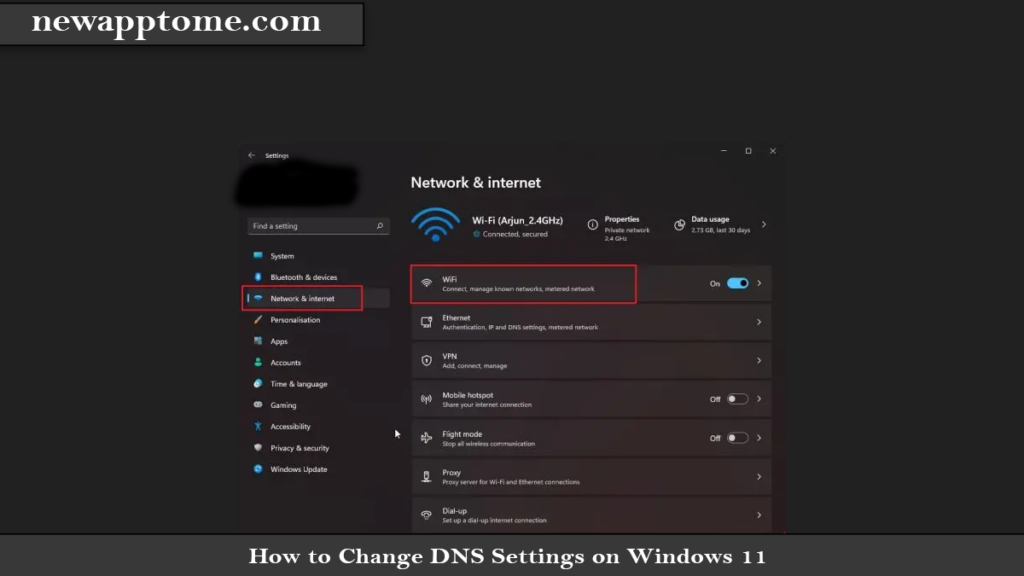
1- Press “Win + I” to open the settings menu in Windows 11. In the menu that opens, click “Network and Internet.” Select “Wi-Fi” or “Ethernet” according to your settings.
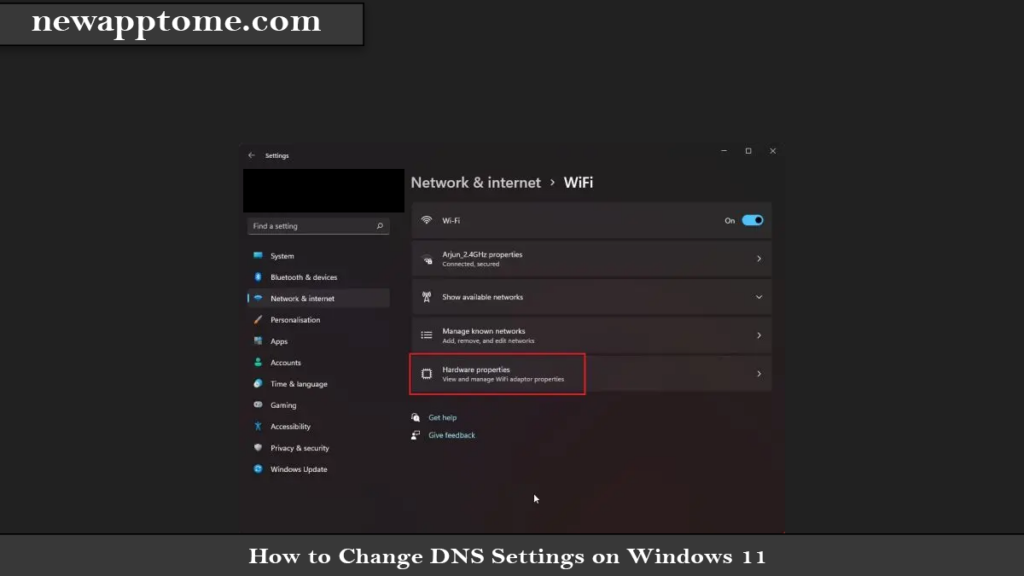
2. Next, scroll down and look for “Hardware properties. “ Open it.
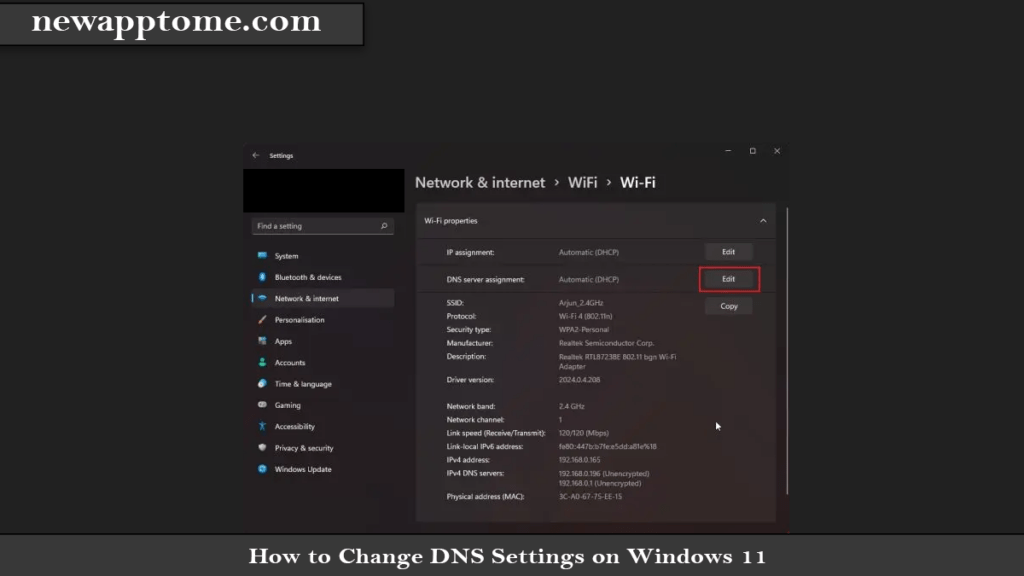
3. Click “Edit” next to “DNS server assignment.” It will be set to “Automatic (DHCP),” which means Windows 11 is using the DNS server chosen by your ISP. It is what we need to change.
4. select “Manual” from the drop-down menu and enable the “IPv4” toggle.
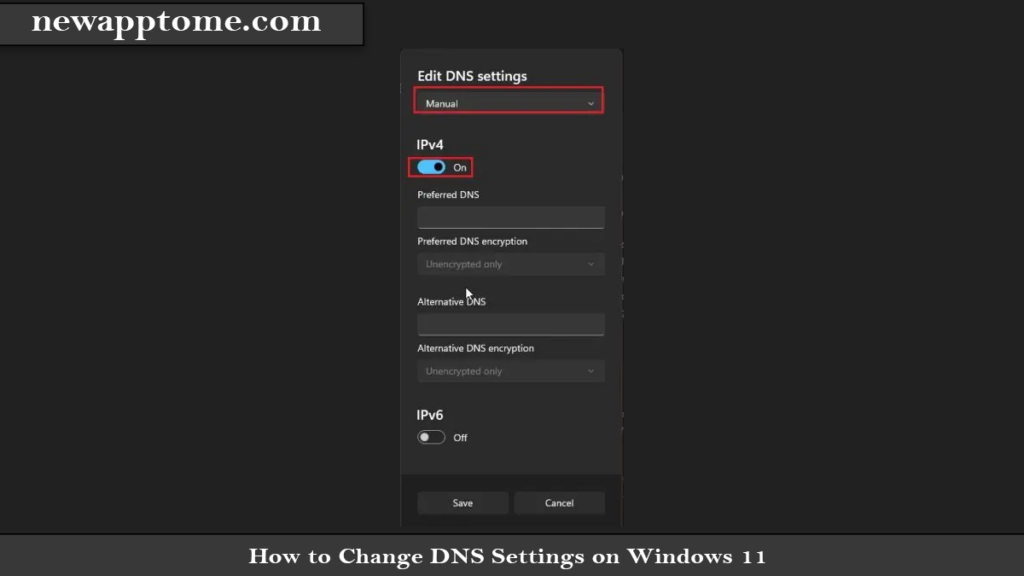
5. After that, enter the custom DNS server address you want to use in the “Preferred” and “Alternative” DNS fields.
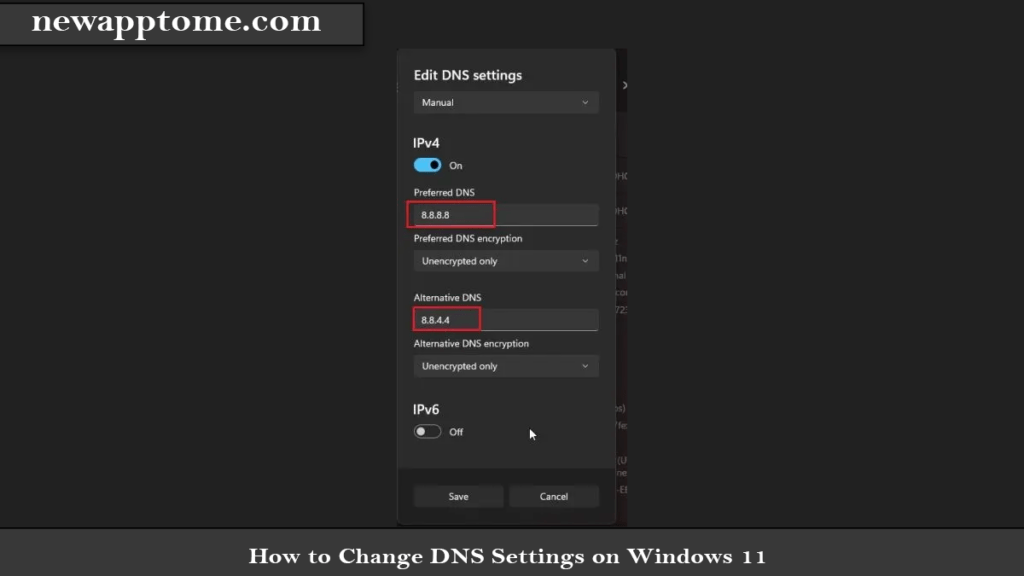
7. Click on the drop-down menu below “Preferred” and “Alternative” DNS encryption and change the encryption type to “Encrypted only (DNS over HTTPS).”
8. Now, click “Save, “and you are done. Along with a custom DNS server in Windows 11, you have also enabled encryption for all your DNS queries, making network communication on your PC more secure.
How to Change Your Password in Windows Best 3 Method
Free DNS Servers for Windows 11
- Cloudflare
Preferred DNS: 1.1.1.1
Alternative DNS: 1.0.0.1 - Google
Preferred DNS: 8.8.8.8
Alternative DNS: 8.8.4.4 - OpenDNS
Preferred DNS: 208.67.222.222
Alternative DNS: 208.67.220.220 - Comodo Secure DNS
Preferred DNS: 8.26.56.26
Alternative DNS: 8.20.247.20 - Quad9 DNS
Preferred DNS: 9.9.9.9
Alternative DNS: 149.112.112.112